电商管理后台--项目总结
|字数总计:2.5k|阅读时长:11分钟|阅读量:
项目初始化
初始化项目创建Vue3.x版本,使用ElementUI库写界面,使用Axios请求数据。
创建Vue3.x项目的几种方式
vue create my_vue_namevue ui 使用vue ui界面创建vue3.x项目
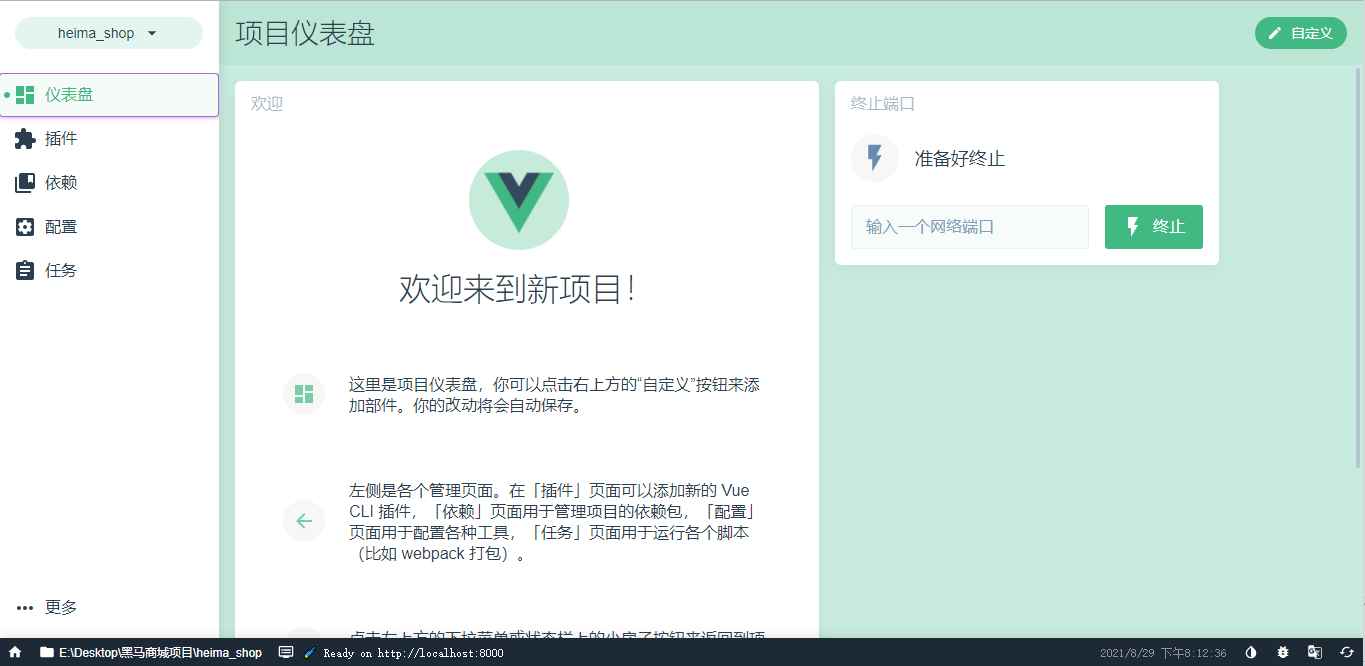
下载插件和依赖
Element UI 基于vue的组件库依赖 axios 使用vue项目,通过axios请求数据- 安装
Vuex Router
最后安装项目,运行项目,梳理项目。
引入Element Ui 库
在vue ui 可视化界面中,安装插件和依赖
请求数据,用单独的文件引入
./network文件,创建 request.js
1
2
3
4
5
6
7
8
9
10
11
12
13
14
15
16
17
18
19
20
21
22
23
24
| import axios from "axios";
export function request(config){
const instance = axios.create({
baseURL: 'http://127.0.0.1:8888/api/private/v1/',
timeout: 5000,
headers: {
'Content-Type': 'application/json;charset=utf-8'
}
})
instance.interceptors.request.use(config => {
config.headers.Authorization = window.sessionStorage.getItem('token')
return config
})
return instance(config)
}
|
数据库搭建
安装数据库工具官网下载
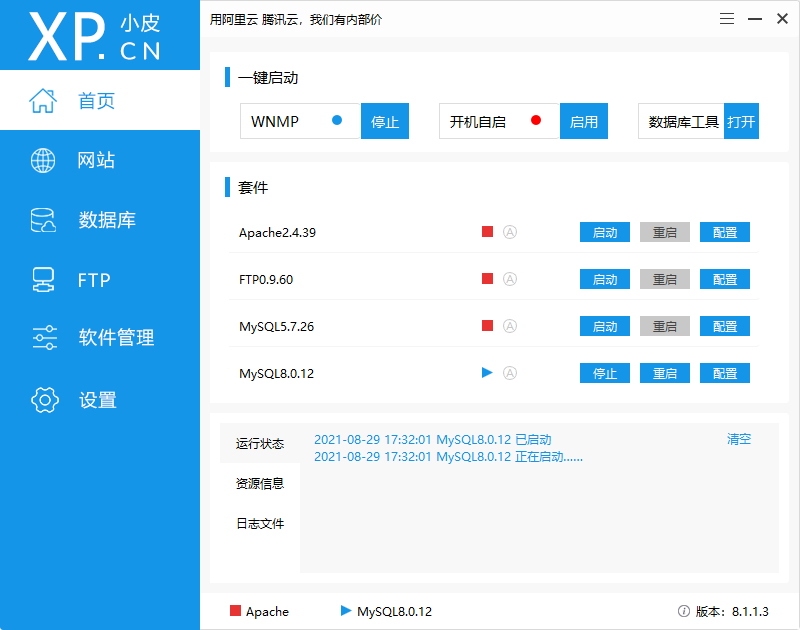
下载数据文件,导入数据库阿里云盘下载
将下载的文件的后缀改为zip格式压缩,db就是数据库。运行数据库要先安装依赖 npm install
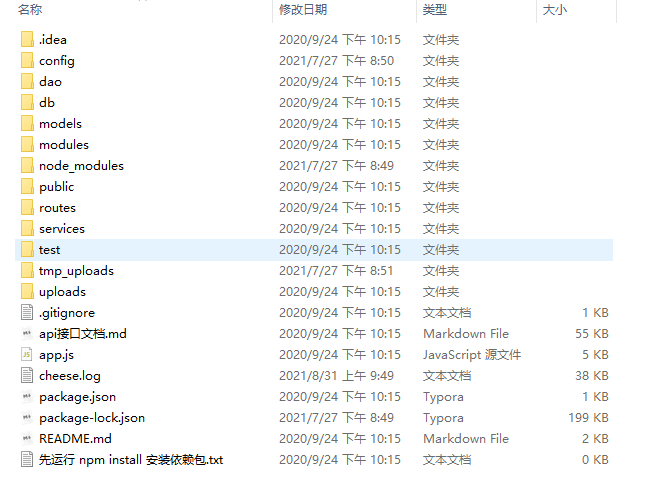


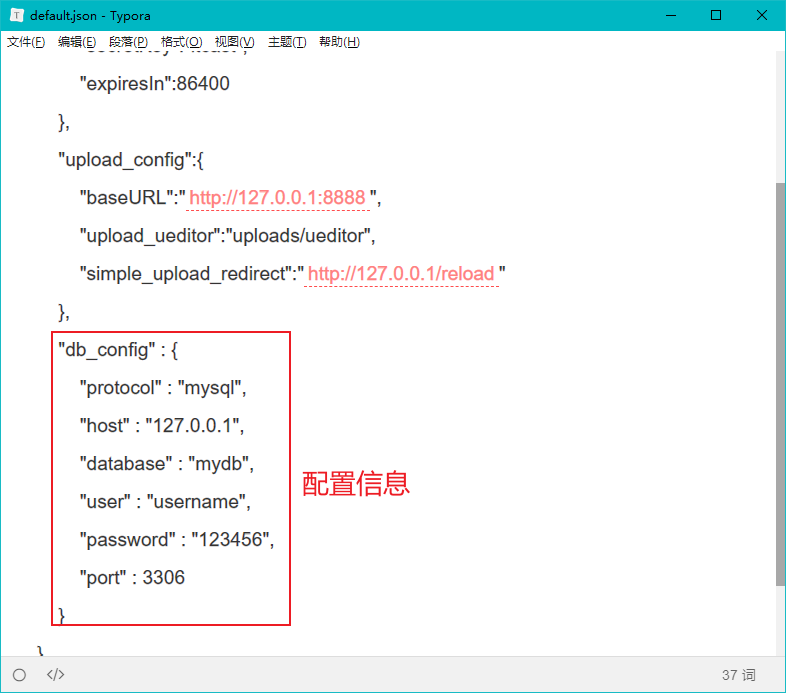
数据库的名字、用户和密码必须一致,在该文件下进入命令行运行app.js,输入命令 node app.js,运行本地数据库。

登录 && 退出功能
创建登录界面
在src/components/login 文件下创建 Login.vue
在src/components/login 文件下创建 Login.js 专为登录使用的数据请求文件
1
2
3
4
5
6
7
8
9
10
11
12
13
14
15
| import { request } from "./request";
export function loginData(form){
const {username,password} = form
return request({
method: 'POST',
url: 'login',
params:{
username,
password
}
})
}
|
1
2
3
4
5
6
7
8
9
10
11
12
13
14
15
16
17
18
19
20
21
22
23
24
25
26
27
28
29
30
31
32
33
34
|
login() {
this.$refs.loginFormRef.validate(async (value) => {
if (value) {
loginData(this.form)
.then((res) => {
const meta = res.data.meta;
if (meta.status === 200) {
this.$message({
showClose: true,
message: "登录成功",
type: 'success'
});
window.sessionStorage.setItem("token",res.data.data.token)
this.$router.push("/home")
}else{
this.$message({
showClose: true,
message: "登录失败",
type: 'error'
});
}
})
.catch((err) => console.log(err));
}
});
},
|
1
2
3
4
5
6
7
|
logout() {
window.sessionStorage.clear();
this.$router.push("/login");
},
|
导航守卫
1
2
3
4
5
6
7
8
9
10
11
12
13
|
router.beforeEach((to, from, next) => {
if (to.path === "/login") return next();
const tokenstr = window.sessionStorage.getItem("token");
if (!tokenstr) return next("/login");
next();
});
|
路由
1
2
3
4
5
6
7
8
9
10
11
12
13
14
15
16
17
18
19
20
21
22
23
24
25
26
27
28
29
30
31
32
33
34
35
36
37
38
39
40
| import Vue from "vue";
import VueRouter from "vue-router";
const Login = () => import("components/login/Login");
const Welcome = () => import("components/welcome/Welcome");
const Home = () => import("views/home/Home");
const User = () => import ('components/user/User')
const Role = () => import ('components/role/Role')
const Rights = () => import ('components/rights/Rights')
Vue.use(VueRouter);
const routes = [
{ path: "/", redirect: "/home" },
{ path: "/login", component: Login },
{
path: "/home",
component: Home,
redirect : '/welcome',
children: [
{ path: "/welcome", component: Welcome },
{ path: "/users", component: User },
{ path: "/roles", component: Role },
{ path: "/rights", component: Rights }
]
}
];
const router = new VueRouter({
mode: "history",
base: process.env.BASE_URL,
routes
});
export default router;
|
主页布局
菜单栏使用UI库里面的组件,通过请求菜单数据,来展示菜单栏
在src/netWork 文件下创建 Menu.js 专为请求菜单栏使用的数据请求文件
1
2
3
4
5
6
7
8
9
10
| import { request } from "./request";
export function getMenuList(){
return request({
method:'GET',
url: 'menus'
})
}
|
1
2
3
4
5
6
7
8
9
10
11
12
|
async getMenuList() {
const { data: res } = await getMenuList();
if (res.meta.status === 200) {
this.menuList = res.data;
} else {
this.$message.error("请求菜单栏数据失败");
}
},
|
保存链接激活状态
当路由切换的时候,或者刷新的时候,如何保存你点击的菜单栏呢。方法是如token值保存一样,将菜单栏状态存入浏览器缓存中。
1
2
3
4
5
6
7
|
saveNavState(activePath){
window.sessionStorage.setItem('activePath',activePath)
this.activePath = activePath
}
|
用户管理
在src/netWork 文件下创建 User.js 专门为用户数据管理的请求文件
1
2
3
4
5
6
7
8
9
10
11
12
13
14
15
16
17
18
19
20
21
22
23
24
25
26
27
28
29
30
31
32
33
34
35
36
37
38
39
40
41
42
43
44
45
46
47
48
49
50
51
52
53
54
55
56
57
58
59
60
61
62
63
64
65
66
67
68
69
70
71
72
73
74
75
76
77
78
79
80
81
82
83
84
85
86
87
88
89
90
91
92
93
94
95
96
| import { request } from "./request";
export function getUserList(value){
const {query,pagenum,pagesize} = value
return request({
method:'GET',
url: 'users',
params:{
query,
pagenum,
pagesize
}
})
}
export function putUserState(userInfo){
return request({
method:'PUT',
url: `users/${userInfo.id}/state/${userInfo.mg_state}`,
})
}
export function addUser(value){
return request({
method:'POST',
url: 'users',
data:{
username:value.username,
password:value.password,
email:value.email,
mobile:value.mobile
}
})
}
export function getUserInfo(id){
return request({
method:'GET',
url: `users/${id}`,
})
}
export function putUserInfo(form){
return request({
method:'PUT',
url: `users/${form.id}`,
data:{
email:form.email,
mobile:form.mobile
}
})
}
export function deleteUserInfo(id){
return request({
method:'DELETE',
url: `users/${id}`
})
}
export function getUserRoles(){
return request({
method: 'GET',
url: 'roles'
})
}
export function putUserRole(roleId,info){
return request({
method: 'put',
url: `users/${roleId}/role`,
data: info
})
}
|
获取用户列表
1
2
3
4
5
6
7
8
9
10
11
12
13
14
15
16
17
18
|
async getUserList() {
const { data: res } = await getUserList(this.queryInfo);
if (res.meta.status !== 200) {
this.$message.error("获取用户列表失败");
} else {
this.userList = res.data.users;
this.total = res.data.total;
}
},
handleSizeChange(newSize) {
this.queryInfo.pagesize = newSize;
this.getUserList();
},
|
修改用户状态
1
2
3
4
5
6
7
8
9
10
11
12
|
async userStateChanged(userState) {
const {data:res} = await putUserState(userState)
if(res.meta.status !== 200){
this.$message.error("更新用户状态失败!");
userState.mg_state = !userState.mg_state;
}else{
this.$message.success(res.meta.msg)
}
},
|
添加用户
1
2
3
4
5
6
7
8
9
10
11
12
13
14
15
16
17
18
19
20
21
|
addUserSubmit() {
this.$refs.addFormRef.validate((res) => {
if (!res) return;
const {data:res2} = await addUser(this.addForm)
if (res2.meta.status == 201) {
this.$message.success("添加用户成功");
this.getUserList();
} else {
this.$message.error(res2.meta.msg);
}
this.addDialogVisible = false;
});
},
|
查询用户信息
1
2
3
4
5
6
7
8
9
10
11
12
|
async showEditDialog(id){
const {data:res} = await getUserInfo(id)
if(res.meta.status !==200){
return this.$message.error('查询用户信息失败')
}
this.editForm = res.data
this.editDialogVisible = true
},
|
修改用户信息
1
2
3
4
5
6
7
8
9
10
11
12
13
14
15
16
17
18
|
editUserInfoSubmit(){
this.$refs.editFormRef.validate(async valid=>{
if(!valid) return
const {data:res} = await putUserInfo(this.editForm)
if(res.meta.status!==200) return this.$message.error('更新用户信息失败')
this.editDialogVisible = false
this.getUserList()
this.$message.success('更新用户信息成功')
})
},
|
删除用户
1
2
3
4
5
6
7
8
9
10
11
12
13
14
15
16
17
18
19
20
21
22
23
24
25
26
|
async removeUserById(id){
const confirmResult =await this.$confirm('此操作将永久删除该用户, 是否继续?',
confirmButtonText: '确定',
cancelButtonText: '取消',
type: 'warning'
}).catch(err=>err)
if(confirmResult !== 'confirm'){
return this.$message.info('已取消删除!')
}
const {data:res} = await deleteUserInfo(id)
if(res.meta.status !==200){
return this.$message.error('删除用户失败!')
}
this.$message.success('删除用户成功!')
this.getUserList()
},
|
获取角色信息
1
2
3
4
5
6
7
8
9
10
11
12
13
14
|
async setRole(userInfo){
this.userInfo = userInfo
const {data:res} = await getUserRoles()
if(res.meta.status !== 200){
return this.$message.error('获取角色列表失败')
}
this.rolesList = res.data
this.setRoleDialogVisible = true
},
|
修改分配的角色
1
2
3
4
5
6
7
8
9
10
11
12
13
14
15
16
17
|
async setRoleInfo(){
if(!this.selectedRoleId){
return this.$message.error('请选择要分配的角色')
}
const {data:res} = await putUserRole(this.userInfo.id,{rid:this.selectedRoleId})
if(res.meta.status !== 200){
return this.$message.error('更新角色失败')
}
this.$message.success('更新角色成功')
this.getUserList()
this.setRoleDialogVisible = false
},
|
权限管理
角色列表
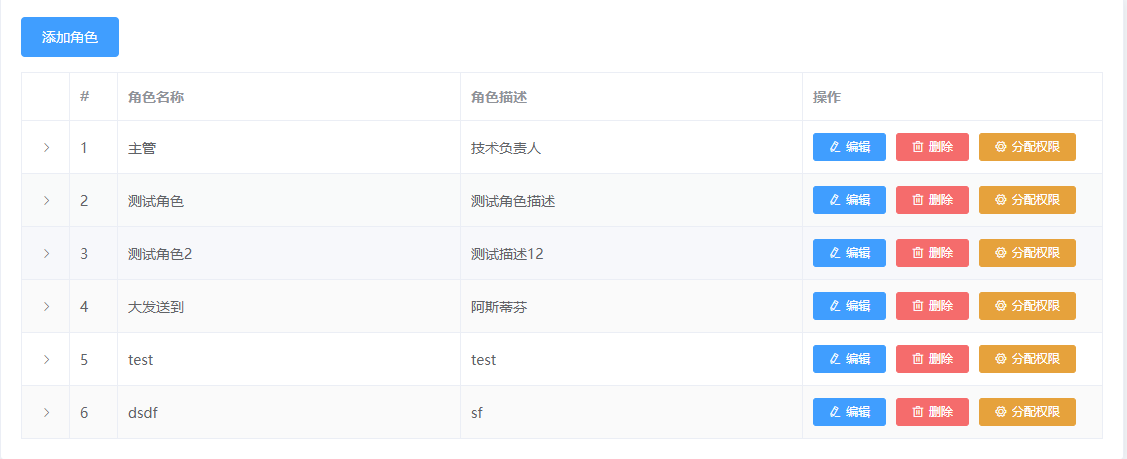
在 ./netWork文件下,创建roles.js 角色列表请求数据文件
1
2
3
4
5
6
7
8
9
10
11
12
13
14
15
16
17
18
19
20
21
22
23
24
25
| import { request } from "./request";
export function getRoleList(method,url){
return request({
method,
url,
})
}
export function deleteRoleRights(roleId,rightId){
return request({
method: 'delete',
url: `roles/${roleId}/rights/${rightId}`
})
}
export function editRoleRights(roleId,rids){
return request({
method:'POST',
url: `roles/${roleId}/rights`,
data: rids
})
}
|
权限列表
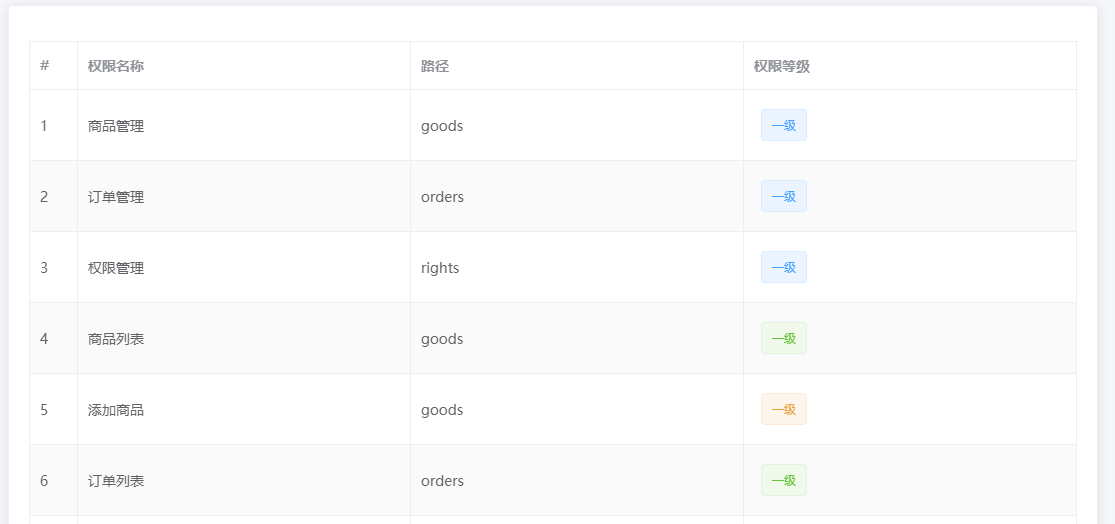
在 ./netWork文件下,创建rights.js 权限管理请求数据文件
1
2
3
4
5
6
7
8
9
10
11
12
13
14
15
16
17
18
19
20
| import { request } from "./request";
export function getRightsList(method,url){
return request({
method,
url
})
}
async getRightsList(){
const {data:res} = await getRightsList('GET','rights/list')
if(res.meta.status !== 200){
return this.$message.error('获取权限列表失败')
}
this.rightsList = res.data
}
|


